Installation
Installation for NSTI is stone simple once you’ve ensured you have all the necessary prequisites installed.
Connect to the Server
First things first, establish an SSH connection to the desired server you wish to install SSH on. You must have credentials that have super user privileges.
Example:
$ ssh root@192.168.5.177
Download the NSTI Tarball
Now we must download the NSTI Tarball. This is what we will use to install the actual NSTI application. The URL for the NSTI tarball is http://assets.nagios.com/downloads/nagiosti/downloads/nagiosti-head.tar.gz, which is the file we will want to download to our /tmp directory.
$ cd /tmp
$ curl http://assets.nagios.com/downloads/nagiosti/downloads/nagiosti-head.tar.gz -O
This downloads the latest version of NSTI. If you are seeking an older version of NSTI, the older tarballs will still be available. Replace ‘head’ in the address with the version you seek.
Note
If you are behind a proxy, you may need to adjust the commands in this section to suit your needs.
Extract the NSTI Tarball
Once we have the NSTI tarball at our mercy, we must not extract the information from it. Once again a trivial case for shell commands.
$ tar xf nagiosti-head.tar.gz
Note
If downloading a specific version rather than ‘head’, please make the necessary substitutions in the filename.
Once extracted, a new folder nagiosti is created. Move into this new folder.
$ cd nagiosti
Preparing for installation run
Before running the install script, there are a few issues you need to take into account.
What user and group do you want this application to run as?
The default NSTI will use is the nagios user, and nagcmd group. If you wish to change this behavior. To do this, open up the file functions.py in the current directory and change the USER and GROUP variable specified at the top of the file. Please note the specified USER and GROUP must exist on your system.
Note
This user and group specification makes this installer very fragile in the case of added security measures such as SELinux and AppArmor. For the purposes of this documentation, I will not cover how to implement either of these technologies, but I only suggest that you temporarily disable both of them if trouble is permissions issues are found. Once these have been deemed to be causing the issue, then refer to the former’s documentation to allow access to the nagiosti/ directory tree.
Warning
This group must also contain Apache! If this group does not contain Apache it will almost certainly lead to Server 500 errors.
What is the location of your Apache install?
Unfortunately, there isn’t a universally accepted location for Apache configurations to be placed (or even named, for that matter.) The NSTI install script will guess /etc/httpd/conf.d/ first, then it will use the APACHE_CONF variable that is also in the header of the functions.py script. This variable defaults to /etc/apache2/conf.d, however, if you’re Apache’s configuration directory is in a different location, make sure to edit in the proper location.
What are the credentials for connecting to MySQL?
Bear in mind, you must enter the proper credentials for NSTI to access the snmptt table in your MySQL database. Please record the credentials required to do so, and be sure to edit the /tmp/nagiosti/nsti/settings.py file to use the set forth credentials.
Edit the following lines in the settings.py file:
DATABASES = {
    'default': {
        'ENGINE'    : 'django.db.backends.mysql',   # Add 'postgresql_psycopg2', 'postgresql', 'mysql', 'sqlite3' or 'oracle'.
        'NAME'      : 'snmptt',                     # Or path to database file if using sqlite3.
        'USER'      : '<your snmptt user>',         # Not used with sqlite3.
        'PASSWORD'  : '<your snmptt pass>',         # Not used with sqlite3.
        'HOST'      : '',                           # Set to empty string for localhost. Not used with sqlite3.
        'PORT'      : '',                           # Set to empty string for default. Not used with sqlite3.
        }
    }
Running the installation script
Now that you’ve done the necessary pre-configuration, we can now install NSTI using the installation script. This is a simple process of running the install.py script.
$ python install.py
Tip
If you moved around in your directories at all, make sure you are running this command from /tmp/nagiosti
The install script will check a few things, and eventually make you read its warning list ensuring that you’ve installed all the proper items. If you’ve been reading through and following through this guide, you will be fine. If you have not, please take a moment and ensure the prerequisites have been installed.
Once you are sure you have the necessary prerequisites, please type in ‘Start’.
At this point, NSTI will go to work installing the necessary packages, such as Python modules and moving files around, create database tables. Once it has done the majority of its work, it will prompt the user:
Say yes, and answer all the questions it asks, which will be general user registration questions such as contact email and password.
After entering the information, the installer will continue on its way through the installation process. At the end, it will print the following:
Once this is done, you’ll need to start the NSTI daemon:
$ /etc/init.d/nsti start
And restart your Apache daemon:
$ apachectl -k graceful
Finally, you should be able to access NSTI’s web interface.
Tip
If you don’t run any other web applications from this server, ensure that the firewall will allow web traffic through to Apache, otherwise you will be connection refused errors.
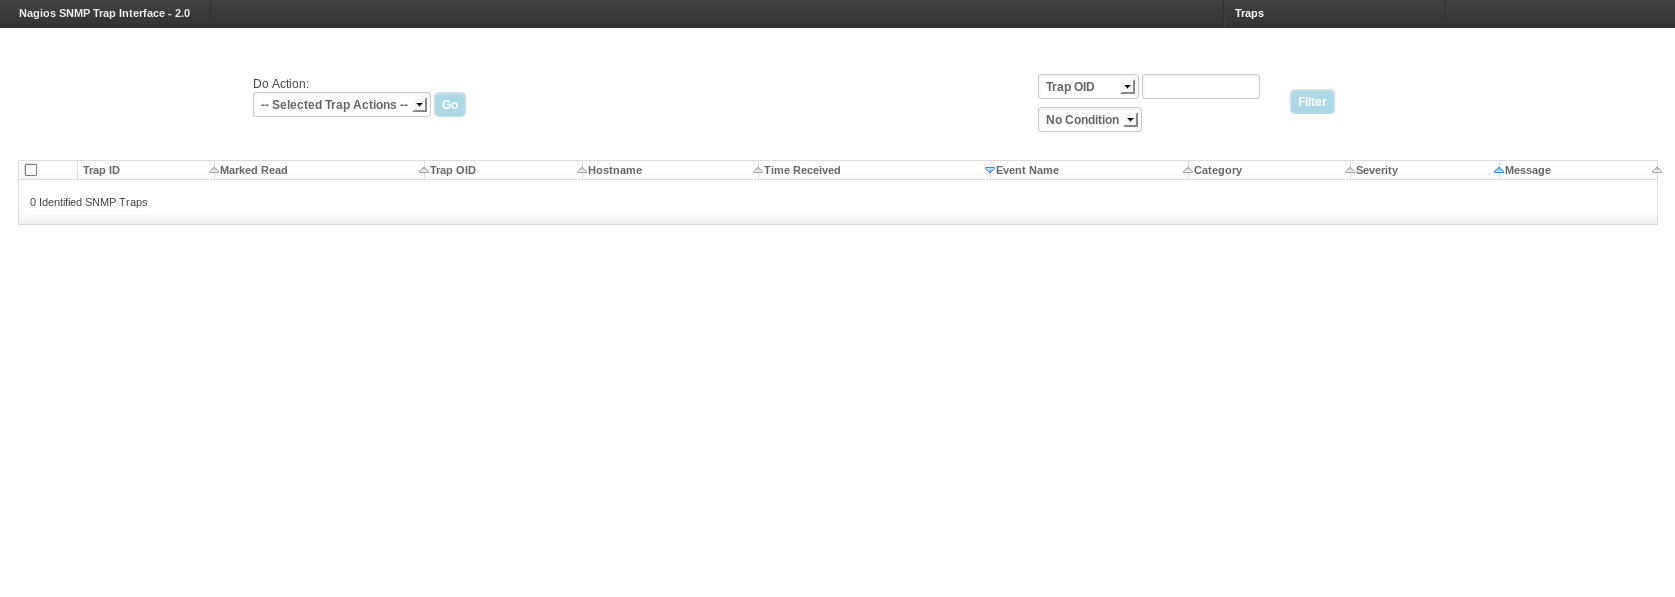
Verifying Successful Installation
Now it is time to access the web interface to verify that all went well. Open a web browser and access:
http://<your server ip>/nsti
You should see this
Final Settings for SNMPTT
Before we ultimately move on from the installation, we need to make sure the proper SNMPTT settings are set, and while these configurations are for SNMPTT, not NSTI, NSTI requires these settings to be present in SNMPTT to be of any use at all.
We need to ensure some proper settings in the /etc/snmp/snmptt.ini are set. This is the default path for the snmptt.ini file, however you’re installation process may have landed it in a different spot. Open this file in a text editor and change (or ensure they are proper) the following directives:
log_enable
This must be set to 1, so the proper syntax in the ini file will be:
log_enable = 1
unknown_trap_log_enable
This must also be set to 1:
unknown_trap_log_enable = 1
mysql_dbi_enable
This must also be set to 1:
mysql_dbi_enable = 1
mysql_dbi_host
You must set this to the same host that NSTI is reading off of, in my case, its localhost:
mysql_dbi_host = localhost
mysql_dbi_port
You must set this to the same port that NSTI is reading from, which in my case is the default 3306:
mysql_dbi_port = 3306
mysql_dbi_database
Here you specify the database name, which should be snmptt, unless you created the database with a different name:
mysql_dbi_database = snmptt
mysql_dbi_table
Here you specify the table name, this must be snmptt:
mysql_dbi_table = snmptt
mysql_dbi_table_unknown
This is where it will store unknown traps, this must be snmptt_unknown:
mysql_dbi_table_unknown = snmptt_unknown
mysql_dbi_username
This is the name SNMPTT will use to dump traps into the database, in my case its snmptt, use whichever user account you made for MySQL:
mysql_dbi_table_unknown = snmptt_unknown
mysql_dbi_password
The corresponding password for the user:
mysql_dbi_password = snmpttpass
Now you will need to restart snmptt:
/etc/init.d/snmptt restart
And now, the configuration is complete for logging traps to a MySQL database.